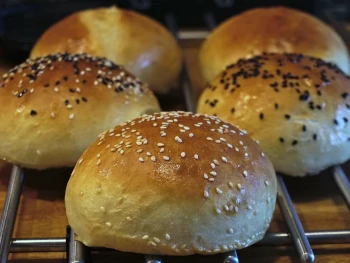
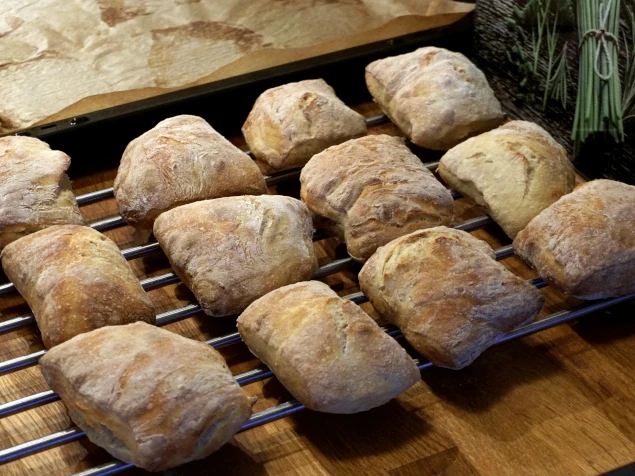
Lovely small breakfast rolls that rise in the fridge overnight. No kneading of the dough is needed.
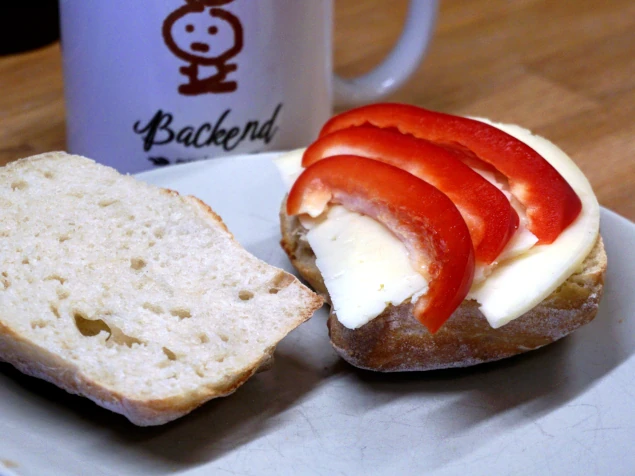

With a little preparation, you can have delicious homemade bread with minimal effort. Perfect to have for breakfast on the weekend when you enjoy a little extra with homemade bread in the morning.
These buns are good for many reasons, but you don't need any special equipment or even knead the dough. Cold fermentation in the fridge overnight takes care of that. And when it's time to shape the individual buns, I just roll out the dough into a square and cut it into 12 roughly equal pieces.
So no - it might not be the prettiest buns, but the simplicity and flexibility wins over the appearance.
If you don't have Manitoba Cream, you can also use regular wheat flour, although I think I got better results with the former.
Ingredients
Directions
- Heat the water to finger-warm (37°C) and pour into a larger bowl.
- Add the dry yeast and wait 10 minutes.
- Add the rest of the ingredients and mix well. You don't need to knead - just make sure everything is mixed well.
- Cover the bowl with a lid or plastic wrap and leave to rise at room temperature until the dough has doubled in size (approx. 1-2 hours).
- Put the dough in the fridge and leave for AT LEAST 8 hours (overnight).
- Next morning - start the oven at 250°C hot air (fan assisted).
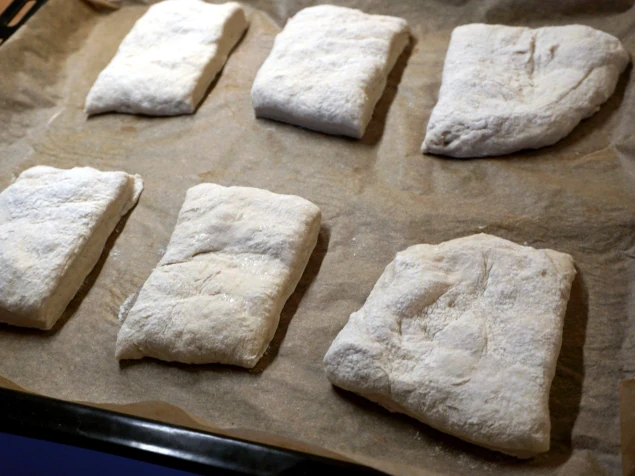
- Take the dough out of the refrigerator and pour it out carefully onto a lightly floured surface.
- Stretch the dough into a square and lightly flour the top.
- Cut the dough into 12-16 squares and place them on 2 baking sheets with parchment paper.
- When the oven has reached temperature, bake the buns (one sheet at a time) until they have a nice color (12-14 minutes). A tip is to throw 2 ice cubes in the bottom of the oven (or put in an oven-proof form and fill it with 2 tablespoons of water) so that a little steam is formed initially and the buns will rise better.
- Let the buns cool on a wire rack.
- Eat immediately (still slightly warm in the middle) or let cool completely to freeze for longer shelf life.
Nutrition Facts*
| Total | Serving | 100 g | |
|---|---|---|---|
| Energy | 2364.88 kcal | 197.07 kcal | 200 kcal |
| Carbohydrates | 458.2 g | 38.18 g | 38.75 g |
| Fat | 14.43 g | 1.2 g | 1.22 g |
| Protein | 81.35 g | 6.78 g | 6.88 g |
| Sugar | 2.6 g | 0.22 g | 0.22 g |
| Salt | 11.82 g | 0.99 g | 1.00 g |
* The nutritional information provided is approximated and calculated using the ingredients available in the database. Info will vary based on cooking methods and brands of ingredients used.I am not a certified nutritionist. Please consult a professional nutritionist or doctor for accurate information and any dietary restrictions and concerns you may have.